


How To Make a Live Catch Rabbit Trap (without being a master carpenter.)
I produced this design because I’d got a load of lightweight mesh that I wanted to use up, but which wasn’t strong enough to make a cage on its own.
Materials you will need:
[checklist]
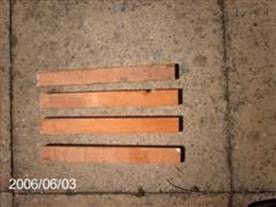
- 4 lengths of wood for posts – 11 inches long and about ½ inch by 1½ inches in section.
- I used a length of slate lath that I’d got lying around.
- 4 x 1 meter lengths of 4mm cold drawn steel rod – I bought mine from B&Q for about £1 each. Thick wire would probably do, but this will form the frame so needs to be fairly sturdy.
- 2 pieces of plywood – no thicker than ½ inch.
- One piece 9 inches by 10 inches for the door
- One piece 9 inches by 3 inches for the treadle
- Three screw eyes – internal diameter 4 to 5 mm.
- Wire mesh – a piece about 1m wide by nnn long
- Quite a few small cable ties plus 3 larger ones.
- A 3 inch length of thick wire.
- 24 inches of string.
- Small wire staples if you don’t have a staple gun.
[/checklist]
Tools you will need:
[checklist]
- Wood saw
- Drill with a 4mm bit
- Wire cutters
- Hack saw for metal
- Staple gun
- Hammer
[/checklist]
Preparing the posts.
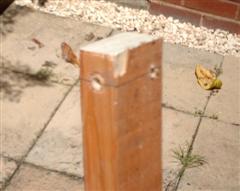
- Take one of the posts.
- Draw a line right round one end, ½ inch in from the end.
- Position it so the narrow side is uppermost and mark the midpoint of the line you’ve drawn. Drill a hole 4mm in diameter at this point. Drill almost right through to the other side, but not quite. (It doesn’t matter if you go through but it’s better if you don’t). Try and drill is as upright as possible to that the hole is a right angle to the surface.
- Turn the piece over on its side and mark a point on the line about ¼ inch in from the narrow side you didn’t drill through. Drill a hole 4mm in diameter at this point – again not all the way through and as upright as possible.
- You’ll end up with two holes which join and look like this
- Now turn the piece round and drill matching holes at the other end – just the same. You want the holes to be in the same sides.
- Repeat for all four posts.
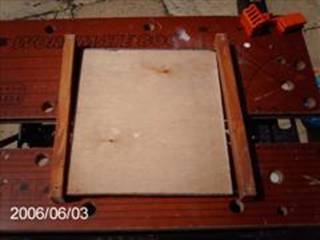
Making the Door
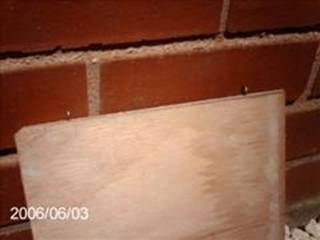
- Screw two of the eyes into the 9 inch edge of the plywood door.
- They should be at equal distance from the ends ( about 1½ inches) and well apart.
- Screw them in tight, but they need to end up ‘in line’ so that the axle can pass through them both.
Assembling the ends
- Using the hacksaw, saw a 10 inch length of each of the lengths of steel rod. Put the longer lengths to one side.
- Take one of the short lengths and one of the posts. Push the rod into the whole on the broad face of the post. Use a light hammer to gently tap it into place. For extra strength apply a little glue (e.g. NoMoreNails) to the hole first.
- Take another short length of rod and do the same thing at the other end.
- Take another post and fit the free ends of the rods into the matching holes.
- Get the whole thing as square as you can and it should look like this. The four remaining holes should all be on the same side.
- Repeat the process with the other two posts and short lengths of rod.
- This time slide the screw eyes of the plywood door over once of the rods before you add the second post.
- The door is slightly too long and will not pass between the post – make sure that it’s on the same side as the four remaining holes.
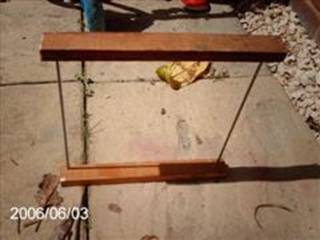
Finishing the frame
- FrameTake the remaining lengths of rod and use them to connect the two ends.
- Use the same gluing and tapping procedure to fix the rod into the holes in the posts.
- This is the skeleton of your trap.
- Push the door from the outside and check that it swings in freely up to the inside of the trap roof.
- Let it fall and it should be stopped by the lower rail.
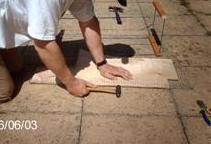
Attaching the mesh
- Lay the mesh out flat on a large area like a patio or drive.
- Using a spare piece of wood as an edge, fold up a 2 inch strip of mesh along one of the short sides of the sheet. Use a hammer to fold this as a neat ‘corner’.
- Place the frame on top of the mesh with one of the long rods positioned into the corner you’ve made.
- Slide it up so that there is only a little bit of overhang at the door end.
- Use small cable ties or similar to fix the mesh the rod.
- Roll the frame over across the mesh so that the side that was facing you is now on the top. Try to keep the mesh tight to the frame.
- You should now be able to fix the mesh to the next rod
- Roll again and repeat.
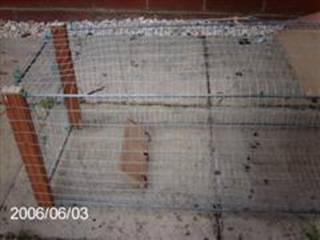
- A final roll and you should now have mesh all the way round the outside.
- Use cable ties and the staple gun or small galvanised wire staples to fix the mesh to the rods and wooden posts all the way round at either end.
- Take care when fixing to the rail holding the door – don’t restrict the ‘swing’ and try to position ties to hold the door roughly central on the bar.
- Finally seal the end of the trap by either folding the overhanging wire over or by use a fresh square. Again secure with cable ties and staples as necessary.
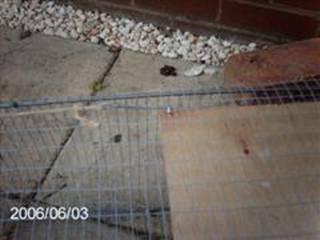
Adding the Trigger Mechanism
- Push the door open and hold it right against the mesh roof. Screw in the last screw eye as near to the corner as possible but in the centre of a mesh hole. The eye must not catch on the mesh when you let the door drop.
- Trigger MechanismTake the plywood treadle and drill three 8mm diameter holes along on of the long edges. One hole in the middle and two equally near the ends. The holes should be about ¼ inch in from the long edge.
- Drill a fourth hole in one of the other corners and tie a piece or string to it.
- Take the short length of thick wire and make a loop in one end.
- Push the door full open again so that the screw eye is through the mesh.
- Push the un-looped end of the wire through the screweye – this will now hold the door open.
- Turn the trap over.
- Take the plywood treadle and hold the edge with the holes against the floor of he trap. Position it about six inches from the end and with the single hole on the same side as the screweye holding the door open.
- Rabbit TrapUse cable ties to attach it to the mesh of the floor. Ensure that you use the same ‘row’ of the mesh for all three ties and don’t tighten fully – the treadle needs to be able to move and this is the hinge.
- Turn the trap back over and check that the treadle moves freely.
- Take the string attached to the treadle and thread the end straight up through the mesh on the top of the trap. Take it along the top of the trap and thread the end through the loop of the wire holding the door open. Tie it off so that when the treadle is pushed down, the wire is pulled out and the door drops shut.
Using the Trap
- Leave the trap outside for a few days before use so that the workshop smells fade a bit. Use gloves when you set it out to catch.
- Bait the trap with carrot ensuring that the bait is behind the treadle in the trap.
- Prop the door open using the trigger mechanism and place the trap where the rabbits are active.
- The door cannot be pushed open from the inside but will open if the trap is turned upside down. Peg it down to reduce the chance of a captured rabbit rolling the trap over and escaping.
Submitted by anonymous.


